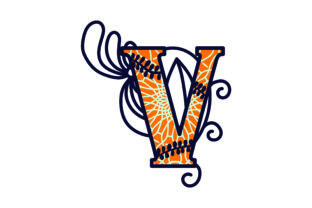
3D Layered Alphabet - S: A Practical Guide to Avoiding Common Design Pitfalls
When you are looking for a way to add depth and dimension to your projects, the 3D Layered Alphabet - S often stands out as a versatile asset. Whether you are a small business owner designing a logo, an educator creating classroom materials, or a hobbyist working on a scrapbook project, this specific letter offers a unique opportunity to create visual impact. However, simply downloading a file is not enough. Many creators jump straight into using 3D layered assets without understanding the technical nuances that separate a professional result from a amateur-looking failure.
The promise of the 3D Layered Alphabet - S lies in its ability to simulate physical depth through digital means. It is designed to be cut, printed, or rendered with multiple layers stacked to create a tangible effect. Yet, the difference between a stunning display piece and a frustrating mess often comes down to how you prepare the file before you ever touch your cutting machine or design software. Let's explore what makes this design valuable and, more importantly, where most people go wrong when trying to use it.
Understanding the File Formats You Receive
One of the most critical steps in evaluating any digital asset is knowing exactly what you are getting. When you acquire the 3D Layered Alphabet - S, you typically receive a package containing SVG, Transparent PNG, EPS, and DXF files. Each format serves a distinct purpose, and confusing them can lead to wasted time and money.
SVG and EPS files are vector-based. This means they are made of mathematical paths rather than pixels. They are essential if you plan to scale the letter "S" up to a billboard size or down to a business card without losing quality. These formats allow you to edit individual layers, change colors, and adjust the spacing between the 3D segments. If you try to use a raster image (like a standard JPEG) for a multi-layered cut, you will find yourself fighting against pixelation every step of the way.
DXF files are the industry standard for CNC machines and laser cutters. If you intend to physically build the 3D "S" using wood, acrylic, or cardboard, the DXF ensures that your cutting tool follows the exact contours required for each layer. Transparent PNGs are useful for quick mockups or web graphics where you need to see the transparency immediately, but they lack the precision needed for production work.
A common mistake is assuming all files in the package are interchangeable. Using a PNG for a laser cutter program will result in errors because the software cannot interpret the vector paths required for precise cutting. Always verify which file type matches your intended output device before starting your project.
The Hidden Challenge of Layer Alignment
The defining feature of the 3D Layered Alphabet - S is the separation of its components. The design relies on stacking different shapes to create the illusion of thickness. However, many users overlook the importance of alignment during the setup phase. In a perfect world, every layer would snap together perfectly, but reality often involves slight shifts in positioning.
If your layers are even slightly misaligned, the final 3D effect looks distorted. Instead of a clean, stepped edge, you might end up with a jagged appearance that ruins the aesthetic. This issue is particularly prevalent when importing files into design software like Cricut Design Space, Silhouette Studio, or Adobe Illustrator. Sometimes, the layers come grouped in unexpected ways, or the coordinate points are offset.
To avoid this, always ungroup the elements immediately after importing the file. Check the center point of each layer to ensure they share a common axis. Take the time to manually nudge the layers until they are perfectly concentric. While this requires patience, skipping this step is a false economy. The few extra minutes spent aligning the layers now will save you hours of frustration later when the cuts don't match up or the print looks off-center.
Selecting the Right Materials for the Effect
Even with a perfect file, the 3D Layered Alphabet - S can fail if the material choice does not support the design concept. A 3D layered effect relies on contrast and texture. Using a single sheet of plain white paper for all layers might result in a flat look where the depth is invisible. Conversely, using materials that are too thick can make the layers difficult to stack securely.
Consider the weight and rigidity of your substrate. For a crisp, modern look, cardstock or chipboard works well because it holds its shape when stacked. For a softer, more organic feel, felt or foam sheets can add a tactile element. However, be aware that softer materials may require adhesive techniques that differ from rigid ones. If you are using a heat press for vinyl, ensure the material can withstand the temperature without warping the delicate edges of the layered design.
Another frequent error is ignoring the color gradient. To truly sell the 3D effect, you should use varying shades of the same color or complementary tones for different layers. Using the exact same color for every layer flattens the image visually. Think of the layers as shadows and highlights; darker shades at the bottom and lighter shades at the top can enhance the perception of depth significantly.
Evaluating Scalability and Proportions
Before committing to a large-scale production run, it is vital to test the scalability of the 3D Layered Alphabet - S. Vector files are scalable, but the proportions of the layers must remain consistent. If you resize the entire group without checking the individual layer thicknesses, the "steps" of the 3D effect might become too wide or too narrow for the intended medium.
For example, if you are creating a sign for a storefront, the gaps between layers need to be visible from a distance. If the layers are too close together, the detail gets lost. On the other hand, if you are making a small badge, the layers might need to be condensed so they fit within the boundary. Always preview your design at 100% scale on your actual material before cutting. This allows you to spot issues with kerning (spacing between letters) or layer overlap that might not be obvious in a thumbnail view.
Additionally, consider the structural integrity of the final product. A tall, thin "S" made of thin paper might collapse under its own weight if the layers are not glued securely. Reinforce the connection points or choose a stiffer material if the design is going to stand upright. Understanding the physical limitations of your chosen media is just as important as mastering the digital file.
Maximizing Efficiency Without Compromising Quality
Finally, efficiency is key for professionals and hobbyists alike. There is no need to start from scratch every time you need an "S". Once you have mastered the process of preparing the 3D Layered Alphabet - S, you can create a template or a library entry. Save your aligned, color-coded layers as a reusable component. This approach ensures consistency across multiple projects and reduces the risk of human error.
However, do not let convenience override creativity. While templates are great for speed, always review the file for each new project. Different materials behave differently, and what worked for one batch of cardstock might not work for another. Stay flexible and be willing to tweak the settings or materials based on the specific requirements of your current job.
By paying attention to file formats, ensuring precise alignment, choosing appropriate materials, and testing scalability, you can unlock the full potential of the 3D Layered Alphabet - S. Avoiding these common pitfalls transforms a simple download into a professional-grade asset that elevates your work. Whether you are communicating a brand message or crafting a personal gift, taking the time to get the details right ensures your final result is as impressive as the design itself.